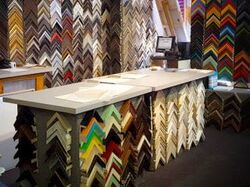
 Among other things in my checkered career, I have worked as both an artist and a custom framer. Controlling the production of the artwork, the reproduction of the artwork, and the framing of the artwork, is a handy bit of vertical integration for a professional artist. It saves time and money, and has given me experience and a perspective on creating, preserving, and displaying artwork that many artists (and framers) lack because they only do one thing or the other. I always love to talk shop and share with other artists all the things I’ve learned over the years. This Framing 101 primer is directed mainly at artists who are just getting started framing their own work to display or sell. At some point in your artistic life (or just life in general) you’ll be obliged to put a picture in a frame. It’s still the best way to display and preserve 2D artwork and photography. Most of the time, you will likely be asking a framer to do this for you. Some people take this as a sign that they don’t need to know anything about framing, but I look at it like owning a car- you might not repair it yourself, but you should at least know what’s under the hood, and you should know how to tell if your professional is indeed a professional. Here are the basic tips I’d recommend for making good decisions when choosing how to frame something: 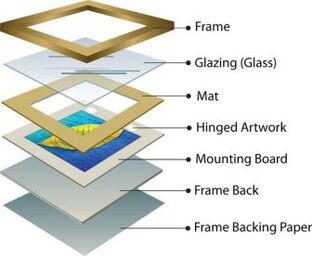 Basics: Anatomy Of A Framing Package The standard 2D framing package is comprised, from back to front, of a dust sheet, backing board (held in with framers points or turn buttons), the mounting board, the artwork, a mat or mats, spacers (optional), glass, and the frame, which is sealed around the whole thing with framers points and covered over by a dust cover. The mat is attached by a hinge to the backing-board, after which the artwork is attached to the backing board in the desired position. You’ll be asked to make choices about what kind of mat, glass, frame, hinging, spacers, and other features you would like on your artwork or photo. When an artwork of unknown provenance (i.e. "I bought this on vacation!" or "I found this in Great Aunt Ethel's attic!") comes in to a framer, the framer has to make educated guesses and err on the side of caution, but there are different choices you can make as an artist, when you know how/when/with what materials an artwork was made. Knowledge is power! There are no real rules to framing, but there are definitely best practices. The most important pseudo-rule I always try to follow when framing is this: Everything should be reversible. Never do anything to the artwork that cannot be undone. Framing isn’t supposed to be forever- glass needs to be cleaned, mats may need to be changed, frames may be switched due to damage or just changing styles. But if you use glue all over everything, you’re toast. I had a customer take a collage she had made by gluing things together, and glue it into a frame- the frame is now a permanent part of her collage, for better or worse. 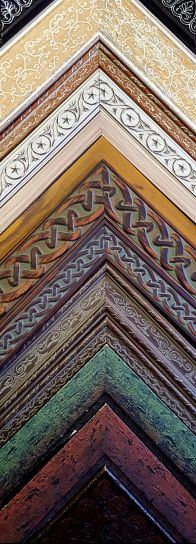 Original artwork shouldn’t be dry-mounted or laminated, since those are permanent processes (Even so-called reversible dry-mounts are iffy to reverse), and since things can go wrong to ruin the artwork, because both of these options can require high heats and/or vacuum presses. The vacuum press flattens things amazingly well, but there’s a chance of permanent wrinkling and folding. Exception to the rule: At one point or another I have actually done all of these things to my own artwork- Laminated a large piece that was too big to be framed without it costing a mint, and dry-mounted a piece that was falling apart and needed more support. BUT I was the one making these decisions with informed consent, and I was aware that this could completely destroy the artwork if done wrong. A friend once had a careless framer at a big-box store dry-mount a watercolor of hers without asking: THIS WAS NOT OKAY. Doing something like that without talking it over is asking for disaster- it’s very risky, and requires research and probably prayer. What if some of her pigments or materials were heat sensitive? If you try to heat-mount an oil pastel, for instance, you’ll have a melty nightmare and you’ll probably ruin both the press and the pastel. For mounting, instead of irreversible methods, I suggest PH neutral hinging tapes that can be removed cleanly, or photo corners or other plastic-based mounting apparatuses, which don’t get stuck to the artwork at all. I’m a big fan of acid-free gummed paper or linen hinging tape- you moisten the back and stick it on, and if you need to take it off later, gently moistening the back of the tape with a damp q-tip should get it to release. The my favorite hinging method is a thing called a T-hinge. You get two pieces of hinging tape, approximately an inch long, and slip them, sticky side up, under the top edge of the artwork about 1/4 of an inch. Then you take two strips of tape and put them, sticky side down, across the exposed parts of the first two pieces of tape, without the horizontal pieces touching the artwork. You press the artwork into that little 1/4 overlap, and you are good to go. Now your artwork should be firmly mounted, with only a 1/4 inch of tape touching the art itself! 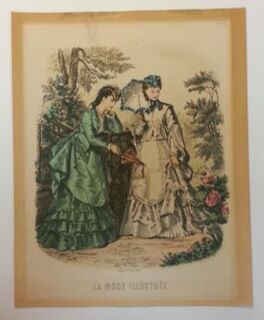 Use the best materials you can afford. Pseudo rule #2: Mats and backing should be acid free– 100% rag mat if possible. Using non-acid-free mats is a terrible and too common rookie mistake. They are cheaper than good mats, but they will become yellowed and brittle far too fast. Sometimes customers will try to make makeshift backings for their artwork using cardboard, construction paper, or other acidic materials. Non-acid-free mats and backing will begin to break down over time- check any elementary school classroom at the end of the year, you’ll see construction paper art projects yellowing and fading! This chemical breakdown can cause outgassing that fogs up glass, which looks terrible. If you remove a piece of glass from an old frame and you can see the outline of where the mat used to cover, some outgassing has taken place. Acidic paper mats can cause artwork to become brittle and discolored. It can even cause brown marks that creep into the sides of artwork, known as “mat burn”- artwork is literally being burned with acid! Take any really old piece of paper out of an old mat, and you’ll see an orangey-brown cast around where the old mat touched it. Ew. 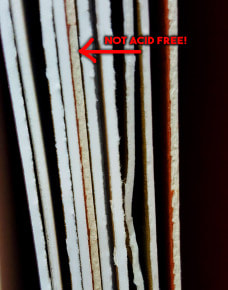 It’s easy to teach someone to tell the difference between an acid free mat and a acid-full paper mat. If you hold them side by side, the core of an acid free mat will be a bright white, and the core of a non-acid-free mat will be a color closer to oak-tag or light café au lait. Mat openings are cut on a bevel, with a specialized tool called a mat cutter. I do not suggest cutting your own mat openings with a box cutter or an exacto knife- they look terrible and messy and unprofessional, and at that point you might as well skip the mat entirely (/snobiness). If you’re working on a cool paper with rough edges, or your artwork is an irregular shape, or you are a fan of a more dynamic modern look with your artwork, you might not want to use a cut mat. This is called a float-mount: you mount the artwork on top of a sheet of matboard so the edges are visible. There are some really cool things you can do with float-mounted art. You can raise it up on a piece of foamboard to make it look like it’s actually floating, or show off edges of torn or handmade papers. Important thing to remember though; Pseudo-rule 3: the glass should NOT touch the artwork. That’s what the mat is for- to keep a bit of space between artwork and glass so that if moisture gets in, it has somewhere to go that’s not your artwork. You’re insulating the art from outside influences- the phrase is “creating a micro-environment.” Also, you’ll want to prevent things like glossy inkjet/ giclee prints, oil pastels or mixed media pieces from sticking to the glass. If you float mount, use spacers. The ones I like are adhesive backed plastic strips that you stick to the edge of the underside of the glass and come in 1/16” ⅛” and ¼” inch sizes. Choosing to use conservation glass is one of the most important and most basic choices you will make while framing. It’s like sunscreen for your artwork. Conservation glass blocks 99% of harmful UV light from reaching your artwork or photo. A good framer will pretty much always default to a UV protective glass, like Tru-Vue brand Conservation Clear glass. UV glass (AKA Conservation Clear) shouldn’t cost very much more than regular glass. If it does, you may be looking at a different kind of glass. This Tru Vue ad is one of the best examples of what can happen if you ignore UV protection. 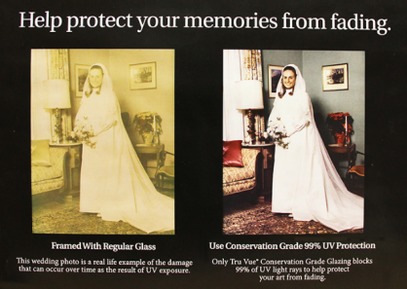 UV protective glass is always a good choice, even if the art is not in direct sunlight. This is important. It will stop your paints and pastels from losing their color, and keep your mats and substrate from discoloring or getting brittle. I’ve seen this at every framer I’ve worked for; a customer says “Oh, well it’s going to be in a room with no direct sunlight!” and I have to explain again that lightbulbs can damage artwork too! Somehow this never becomes common knowledge. If it’s light enough to view the artwork, it’s light enough to damage it. Fluorescent light is particularly damaging. Psuedo-Rule #4: Choose life, choose Conservation Glass. Object lesson: I had a customer bring in a 30 year old chalk pastel one time, done on a green paper with a ghastly lavender mat. She said “I don’t remember it looking so bad when I was younger, but I guess it’s just tastes changing over time!” Nope! When we took it out of the frame, you could see a totally different paper color on the back of the areas where dark black pastel had blocked some light, and different mat colors where the lip of the frame had hidden it. Not just a little shift either- a cool purple had bleached to a light mint green! 30 years in a normally lit room had totally changed the piece from what the artist had intended. UV light is the enemy. More Notes on Glazing: UV glass is not the same as “Non Glare” or “Museum” glass- “Non-glare” glass means it is anti-reflective, but doesn’t necessarily mean it is anti-UV. “Non-glare glass” can also be used to refer to something called Reflection Control, which has an etched matte surface to reduce glare. Reflection Control has an interesting modern texture, but can blur the artwork if it’s more than approximately 1/16 away from the artwork. Museum glass is both UV protective and non-glare, it looks like the glass isn’t even there. It can costs upwards of around 3 times as much as UV glass will, but sometimes this is worth it! Conservation, Reflection Control, and Museum type glazing also come in acrylic. Acrylic is much lighter and is shatter-proof, so for a piece that is being shipped or otherwise handled, or artwork destined for high-traffic or earthquake-prone areas (hey, it’s something to consider!) acrylic may be a better bet. Fun fact: to properly insure an expensive piece, it will need to be framed with acrylic and not glass. You will pay a bit more for the scratch resistant, break resistant nature of acrylic, but if you ever see a shard of broken framing glass impaling the artwork it was supposed to be protecting, you will see how it can be worth it in the long run 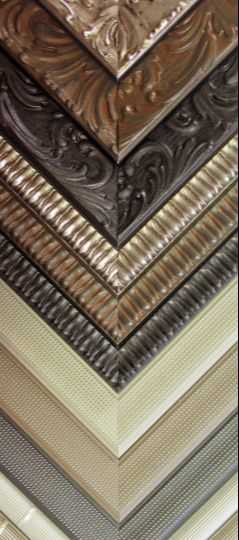 When the artist is choosing framing for their own work, there can be a temptation to cut corners. Trust me, I understand the inclination to throw your own art around haphazardly, and spend as little money on it as possible! But any corners should only be cut with a full understanding of what it will do to the piece over time. It’s important to remember that acceptable shortcuts will be different for each piece, because every artwork has its unique challenges and opportunities. All these things being said, you can certainly cut corners when you need to. If you’re framing 2D art temporarily for a small show, you might be able to frame it yourself using a cheap pre-made frame. If you’re just framing an easily reproducible digital print on matte paper, go ahead and squish it against the glass or dry mount it to a board- if it gets damaged you can make a new one. If you know your artwork is pretty darn lightfast, you can get away with using a less UV protective glass. If you know your piece is going to be reframed by the buyer, you can choose to go with a non-acid-free mat or backing (For instance, I do this when I sell cheap un-matted prints at little art fairs, I include a little disclaimer that says “This print is backed with non-acid-free material, please frame with acid free backing to preserve your print’). Don’t feel like every little color copy needs archival framing, but DEFINITELY don’t skimp on framing a valuable or important piece correctly! This is a lot of information to throw at a person all at once, I realize, so the best advice I can give to someone getting started with framing is to know when to leave everything to a professional. If you’re framing anything that’s expensive, irreplaceable, three dimensional, oddly shaped, unconventionally made, of unknown origins, or easily damaged, you should let a professional framer handle it. Framing is a trade- it takes moments to learn but a lifetime to master. Framers will know things that laymen do not. It’s their job to remember all these options for you and help you to choose the right options for your particular piece. Find a professional framer you trust. Build a relationship and let them take care of your artwork. Ask them about UV glass and acid free products. Ask them if their preferred method of framing is both archival and reversible. Experienced framers will be able to tell you all their own Rules and exceptions to those rules, and they are always learning, because every piece of artwork is its own unique problem. Case in point- in the course of drafting this blog post, I learned a new tricks from the framers who proofread for me; a good framer is always happy to help others to be better framers! I hope this has helped any artists hoping to have more control over what happens to their artwork after it’s made, as well as artists trying to figure out where costs and corners can be cut in framing. I’m happy to answer questions, so leave any pressing inquiries in the comments!
0 Comments
Leave a Reply. |
AboutThoughts, feelings, opinions and lessons about oil pastels, art retail, and other artist's concerns. ArchivesCategories
All
|
 RSS Feed